

How to Set Up and Configure Google Tag Manager on Your WordPress Site
Introduction to Google Tag Manager for Your WordPress Site
Welcome! If you’re looking to make your WordPress site more powerful and get detailed insights into how users interact with your site, you’ve come to the right place. Today, we’ll talk about Google Tag Manager (GTM), an awesome tool that allows you to manage and deploy various tags on your website without needing to write any code.
GTM is a free tool by Google that simplifies the process of adding code snippets to your site, making it especially useful for tracking user activities, conversions, link clicks, and more. By the end of this guide, you’ll know how to set up and configure GTM on your WordPress site efficiently. Ready for some fun and enlightenment? Let’s get started!
Step-by-Step Guide to Setting Up Google Tag Manager on WordPress
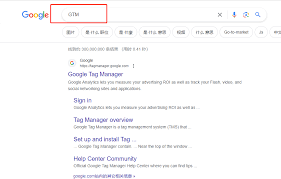
Step 1: Sign Up for Google Tag Manager
First, head over to the Google Tag Manager website and sign up for free. Once logged in, you’ll need to create a new account. Fill in the necessary information like your account name and country. Then, create a container for your website; this is where all your tags will be stored.
Step 2: Get Your GTM Tracking Codes
After setting up your container, Google Tag Manager will provide two snippets of code. These need to be added to your WordPress site. Don’t worry; even if you’re not a tech whiz, we’ll show you how to do it easily using a plugin.

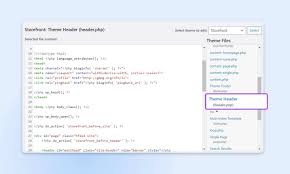
Step 3: Add GTM Codes to Your WordPress Site
Download and install the Insert Headers and Footers plugin on your WordPress site. Once activated, go to the plugin settings and paste the first snippet (head code) into the “Header” section and the second snippet (body code) into the “Body” section. Click save, and you’re done!
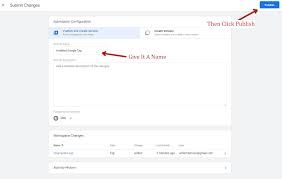
Step 4: Setting Up Tags in GTM
Now that GTM is installed on your site, you can start setting up tags. Go to your GTM dashboard and create a new tag. For instance, you can set up a Google Analytics tag to track user behavior. Select the tag type, enter your tracking ID, and set your triggers. Click save, and your tag is live!
Tips for Effective GTM Configuration on WordPress
To make the most out of Google Tag Manager, here are five practical tips:
- Use Pre-built Templates: GTM comes with templates for popular tools like Google Analytics, Google Ads, and more. Utilize them to save time.
- Implement Custom Triggers: Set up triggers to track specific user actions such as form submissions or button clicks, providing detailed insights.
- Use Data Layers: Extend the data collected by using data layers, especially useful for e-commerce sites to track product IDs, categories, and user details.
- Test Your Tags: Always use the GTM preview and debug mode to test your tags before they go live. This helps avoid any tracking errors.
- Keep Tags Organized: Name your tags, triggers, and variables clearly. This makes it easier to manage them as your site grows.
FAQs About Setting Up GTM on WordPress
Q1: Why should I use Google Tag Manager?
GTM simplifies the process of adding and managing various codes on your site without needing to modify the site’s source code. It also allows you to create custom tags and triggers tailored to your specific needs.
Q2: Do I need to know coding to use GTM?
No, you don’t need to be a coder to use GTM. The platform is user-friendly and provides a simple interface for managing tags.
Q3: Can I use GTM with other tracking tools?
Absolutely! GTM supports integration with a multitude of third-party tools, such as Google Analytics, Facebook Pixel, and more.
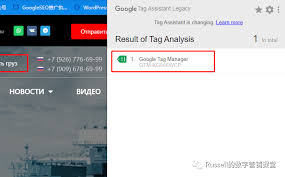
Q4: How do I know my tags are working?
You can use the GTM preview and debug mode to test your tags. Additionally, ensure that you check your analytics reports to confirm that data is being captured.
Q5: Will GTM slow down my website?
No, GTM is designed to load asynchronously, meaning it won’t slow down your site’s load times.
Conclusion and Next Steps
Setting up Google Tag Manager on your WordPress site can provide you with a treasure trove of insights about your users’ behavior, helping you make informed decisions. By following the steps in this guide, you should now have a fully functional GTM on your site, ready to track and reveal valuable data.
Remember, the key to effective use of GTM is to continually test and refine your tags and triggers to meet your evolving needs. Start simple, then gradually implement more complex tracking as you become more comfortable with the tool.
Ready to take the next step? Dive into your Google Tag Manager dashboard and start exploring the wealth of possibilities it offers. Happy tracking!